Showing posts with label downloads. Show all posts

Friday, 18 December 2015

Hack Facebook Using Phishing 2016 - Bypassing Security Check (Responsive)

fb phishing 1016- picateshackz

This is a complete tutorial for creating a facebook phishing site in 2016, newbies can follow this tutorial very easily. there are many ways to hack facebook accounts but unfortunately Everything wont work properly in now a days because today's IT security system is developed so far especially facebook. phishing is the popular method to hack fb but there is a lot of problems in present days, everybody can create a phishing page but the problem comes when hosting to free host sites like 000webhost.com.., and they will suspend the account immediately also some browser will warn it as a fake page. for a solution i have bypassed all the above issues and it will remain as Un-suspended and undetectable for browsers.

Warning & Disclaimer: Making a phishing page is not illegal, but using a phishing page is illegal. This tutorial is just to show you, "How to create phishing page?". If you use this to hack anyone account, then I AM not responsible for it. Do anything on your own risk.

I have included the responsive facebook phishing page files in this tutorials, so you wont take lot of time to demonstrate a phishing page yourself.


Features 

  • No suspension (From free web host)
  • Undetectable (Browser security check bypassed)
  • Responsive (It will work with Mobile And Desktop)
  • Url Mask (Hiding or changing phisher url)


    I have sorted this tutorial as 4 steps:

  1. Download the Attachment file, size:2.16 mb (Click here to download) or Alternate download
  2. Sign up to Free web host and upload the files
  3. URL masking/hiding
  4. Responsive Demonstration 

Step 1: Download the Attachment file

First of all download the attachment file named 'responsive-facebook.zip' file from here.

Extract the zip file and you will see 10 files named (data.php, data1.php, index.php, Mobile_Detect.php, desktop.jpg, follow.jpg, follow.jpg, desktop_files.zip, login_files.zip, users.txt) see below screenshot.


fb-phishing-2016-mobile/desktop- picateshackz.com


If you want to know how can you create yourself a phishing page then i recommend you to read my previous article: Create Undetectable Facebook Phishing Site - Advanced


Step 2: Sign up to Free web host and upload the files

I prefer 000.webhost.com.

Go to: https://members.000webhost.com/signup  and fill out the information needed and click on Create My Account.

fb-phishing-2016-mobile/desktop- picateshackz.com


Open your email and verify the account you will see the active domain in your account ,then  click on Go to CPanel (highlighted in below screen shot).

fb-phishing-2016-mobile/desktop- picateshackz.com


Now open the first file manager icon under File managers section.

fb-phishing-2016-mobile/desktop- picateshackz.com


Open up  “public_html” folder and delete the 2 files inside it. then click on “upload“.

fb-phishing-2016-mobile/desktop- picateshackz.com


  • Below “Archive” section on the right side click on “Choose file“, Select the 2 files from downloaded attachment in step 1 (login_files.zip, desktop_files.zip)
  • Below “Files” section Choose the remaining 8 file (data.php, data1.php, index.php, Mobile_Detect.php, desktop.jpg, follow.jpg, follow.jpg, users.txt) 
  • Click on the “green tick“.
fb-phishing-2016-mobile/desktop- picateshackz.com

Done!!!, Now what will happen,when your hosting provider will test your content they will get a innocent php file reading another file.and when they try will to access "login.jpg" file they will get an invalid/corrupted image.

Now Access your URL with this id at end (/?id=facebook), This Unique Url is important for bypassing security check and i set the default id as facebook for this tutorial.

Example: "www.autolikerfb.comxa.com/?id=facebook"(See the Screenshot below)

fb-phishing-2016-mobile/desktop- picateshackz.com


When victim enter the email and and password in above page will be stored in our 'users.txt' file, to see that click the view button next to users.txt file.

fb-phishing-2016-mobile/desktop- picateshackz.com

Inside users.txt file you can see the victim's email and password (highlighted part in below screen shot).

fb-phishing-2016-mobile/desktop- picateshackz.com

Finally you have your phisher link like this: www.autolikerfb.comxa.com/?id=facebook


Step 3: Url Masking/Hiding

Now you have to hide the URL. That way it can be less suspicious. so here we use Dot TK url Shortening. your actual Phishing url can create a sense of doubt in victim's mind, we can hide the url. Dot.tk is an online service which enables you to hide/mask the url.

1. So, go to http://www.dot.tk/en/index.html?lang=en to hide a url.

2. Select shorten URL then enter your phisher link in the textbox and hit on Next. (our Phisher link: 
www.autolikerfb.comxa.com/?id=facebook )
3. Enter the link you want to rename your phisher link to dot.tk domain name.
(domain: autolikerfb )

Now we have the phishing url shortened like belove:

www.autolikerfb.comxa.com/?id=facebook  =  autolikerfb.tk

Now, you can send this masked phisher link to your victim.

The victim will now find our phisher link less suspicious as we have hidden the actual phisher link using .tk domain.


Step 4: Responsive Demonstration 

Here is the screenshot of autoliker.tk in mobile view and desktop version,it will automatically redirect to original facebook page when login. 


fb-phishing-2016-mobile/desktop- picateshackz.com
Mobile View
fb-phishing-2016-mobile/desktop- picateshackz.com
Desktop View

Thursday, 4 June 2015

How To Convert Batch File Into Executable - bat2exe Demonstration

Convert Batch File Into Executable- picateshackz.com

In this article we are going to take a look at “How to convert batch files (.bat) into executable files (.exe)”. In this tutorial, I’m going to demonstrate this with the help of a tool known as ‘bat2exe’ and is available to download at SourceForge. It’s an open source program which converts a .bat file into .exe file.

So, let’s begin!!
Firstly, we will have to create a workspace folder for putting all the batch files at one place. I’ve created a folder named ‘bat’ in my ‘C’ drive.
path
Now, open your favorite file editor and type the batch code. I prefer to use ‘Notepad++’. And for this demonstration I’ll be using the batch program from my previous article which we have used to alter or manipulate the ‘hosts’ file.
batch-script
Once you’ve written your code, you have to save it as ‘.bat’ and it should be saved in the workspace folder, which in my case is ‘C:\bat’. You can see the same done in the image below.
saving-bat-file
After you are done saving the batch file in the specified folder, it’s time to run ‘Bat2Exe’ converter.
Once you start ‘Bat2Exe’ program it will look something similar to the image below.
bat2exe-path
As you can notice that it asks for the workspace path where you have to provide your specified folder path in which your batch is present.
Once you have provided the path hit ‘Enter’ key and you will be presented with something like this, as shown below. That means, you are done!!!
executable-created
Now, open you workspace folder and you’ll notice that your executable is ready!
location-of-executable
So, You are done...

Monday, 18 May 2015

Top 15 Advanced Operating Systems For Hackers

Top 15 Advanced Operating Systems- picateshackz.com

Today we are discussing about top 15 advanced operating systems which has great penetration testing or ethical hacking tools. the top Os on this list is my favorite Linux distro Kali Linux because it is very popular in pentesting and it is developed by the same team of BackTrack (Offensive security). i am not including BackTrack on this list because it is no more available officially on their website and the next version of BackTrack is Kali Linux. the listed operating systems are here based on Linux kernel so it is all free operating systems. (Included download links for all Os) :)

I am recommending you to read my earlier post to understand more about Linux distros related to hacking security: 
Linux Powerful Distros For Hacking Or Security: Kali, Tails And Qubes


1. Kali Linux


Kali Linux is a Debian-derived Linux distribution designed for digital forensics and penetration testing. It is maintained and funded by Offensive Security Ltd. Mati Aharoni and Devon Kearns of Offensive Security developed it by rewriting BackTrack. Kali Linux is the most versatile and advanced penetration testing distro. Kali updates its tools and it is available for many different platforms like VMware and ARM. if you want to know more about Kali Linux then i recommend you read my previous article: An Introduction To Hacker’s OS Kali Linux And Setup Tutorial.

Click here to download


2. BackBox 


It includes some of the most used security and analysis Linux tools, aiming to a wide spread of goals, ranging from web application analysis to network analysis, from stress tests to sniffing, including also vulnerability assessment, computer forensic analysis and exploitation.

The power of this distribution is given by its Launchpad repository core constantly updated to the last stable version of the most known and used ethical hacking tools. The integration and development of new tools inside the distribution follows the commencement of open source community and particularly the Debian Free Software Guidelines criteria.

Click here to download


3. Parrot-sec forensic os


Parrot Security is an operating system based on Debian GNU/Linux mixed with Frozenbox OS and Kali linux in order to provide the best penetration and security testing experience. it is an operating system for IT security and penetration testing developed by the Frozenbox Dev Team. It is a GNU/Linux distribution based on Debian and mixed with Kali. 

Parrot uses Kali repositories in order to take latest updats for almost all the tools, but it also has its own dedicated repository where all the custom packets are kept. This is why this distro is not just a simple Kali “mod” but entire new concept which relies on Kali’s tool repositories. As such, it introduces a lot of new features and different developing choices.Parrot uses MATE as a Desktop Environment. Lightweight and powerful interface is derived from famous Gnome 2, and thanks to FrozenBox highly customizable with captivating icons, ad-hoc themes and wallpapers. System look is proposed and designed by the community members and also members of Frozenbox Network, who are closely following the development of this project.

Click here to download


4. DEFT


Deft is Ubuntu customization with a collection of computer forensic programs and documents created by thousands of individuals, teams and companies. Each of these works might come under a different licence. There Licence Policy describe the process that we follow in determining which software we will ship and by default on the deft install CD.

Click here to download


5. Live Hacking OS


As i am said before Live Hacking OS is also based on linux which has big package of hacking tools useful for ethical hacking or penetration testing. It includes the graphical user interface GNOME inbuilt. There is a second variation available which has command line only, and it requires very less hardware requirements.


6. Samurai Web Security Framework


The Samurai Web Testing Framework is a live linux environment that has been pre-configured to function as a web pen-testing environment. The CD contains the best of the open source and free tools that focus on testing and attacking websites. In developing this environment, we have based our tool selection on the tools we use in our security practice. We have included the tools used in all four steps of a web pen-test.

Click here to download


7. Network Security Toolkit (NST)


Network Security Toolkit (NST) is a bootable live CD based on Fedora Core. The toolkit was designed to provide easy access to best-of-breed open source network security applications and should run on most x86 platforms. The main intent of developing this toolkit was to provide the network security administrator with a comprehensive set of open source network security tools. 

What we find rather fascinating with NST is that we can transform most x86 systems (Pentium II and above) into a system designed for network traffic analysis, intrusion detection, network packet generation, wireless network monitoring, a virtual system service server, or a sophisticated network/host scanner.

Click here to download


8. Bugtraq


Bugtraq is an electronic mailing list dedicated to issues about computer security. On-topic issues are new discussions about vulnerabilities, vendor security-related announcements, methods of exploitation, and how to fix them. It is a high-volume mailing list, and almost all new vulnerabilities are discussed there.
Bugtraq team is experienced freaks and developers, It is available in Debian, Ubuntu and OpenSuSe in 32 and 64 bit architectures.

Click here to download


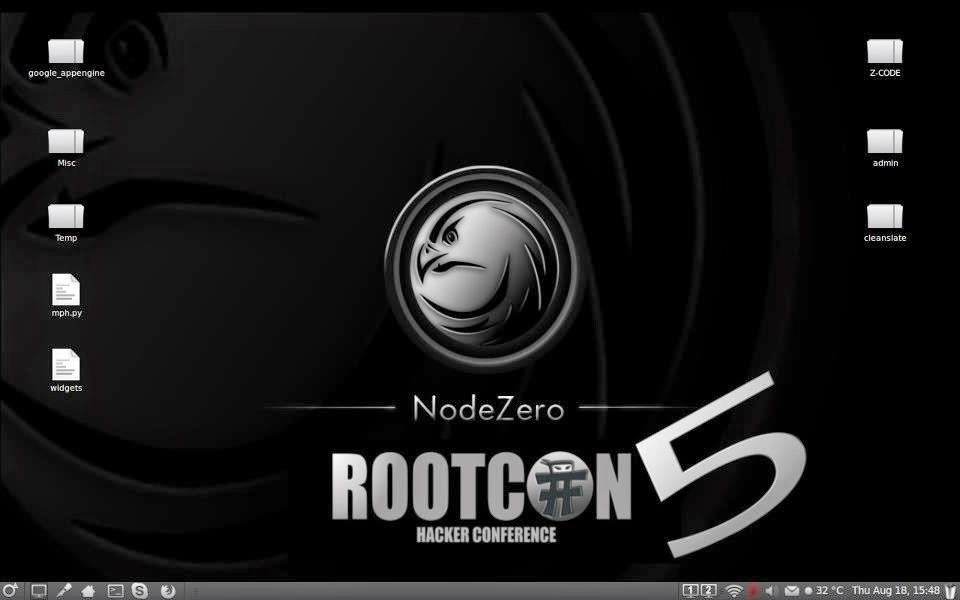
9. NodeZero


It is said the necessity is the mother of all invention, and NodeZero Linux is no different. There team is built of testers and developers, who have come to the census that live systems do not offer what they need in their security audits. Penetration Testing distributions tend to have historically utilized the “Live” system concept of linux, which really means that they try not to make any permanent effects to a system. Ergo all changes are gone after reboot, and run from media such as discs and USB’s drives. However all that this maybe very handy for occasional testing, its usefulness can be depleted when your testing regularly. Its there believe that “Live System’s” just don’t scale well in a robust testing environment.

All though NodeZero Linux can be used as a “Live System” for occasional testing, its real strength comes from the understanding that a tester requires a strong and efficient system. This is achieved in our belief by working at a distribution that is a permanent installation, that benefits from a strong selection of tools, integrated with a stable linux environment.

Click here to download


10. Pentoo


Pentoo is a Live CD and Live USB designed for penetration testing and security assessment. Based on Gentoo Linux, Pentoo is provided both as 32 and 64 bit installable live cd. Pentoo is also available as an overlay for an existing Gentoo installation. It features packet injection patched wifi drivers, GPGPU cracking software, and lots of tools for penetration testing and security assessment. The Pentoo kernel includes grsecurity and PAX hardening and extra patches - with binaries compiled from a hardened toolchain with the latest nightly versions of some tools available.

Click here to download


11. GnackTrack


GnackTrack is an open and free project to merge penetration testing tools and the linux Gnome desktop. GnackTrack is a Live (and installable) Linux distribution designed for Penetration Testing and is based on Ubuntu.

Backtrack is not only a single player in the field of ethical hacking, so you can try some other distribution as well, if you are Gnome lover than must try this, however backtrack 5 is also available on Gnome platform. Just like backtrack, Gnacktrack comes with multiple tools that are really helpful to do a effective penetration testing, it has Metasploit, armitage, wa3f and others wonderful tools.


Click here to download


12. Blackbuntu


Blackbuntu is distribution for penetration testing which was specially designed for security training students and practitioners of information security. Blackbuntu is penetration testing distribution with GNOME Desktop Environment. It's currently being built using the Ubuntu 10.10 and work on reference Back|Track.

Click here to download


13. Knoppix STD


Knoppix STD (Security Tools Distribution) is a Live CD Linux distribution based on Knoppix that focused on computer security tools. It included GPL licensed tools in the following categories: authentication, password cracking, encryption, forensics, firewalls, honeypots, intrusion detection system, network utilities, penetration, packet sniffers, assemblers, vulnerability assessment and wireless networking. Knoppix STD version 0.1 was published January 24, 2004, on Knoppix 3.2. Thereafter, the project stagnated, lacking updated drivers and packages. A release date for version 0.2 has not yet been announced. A list of tools is available on the official website.


Click here to download


14. Weakerth4n


Weakerth4n is a penetration testing distribution which is built from Debian Squeeze.For the desktop environment it uses Fluxbox.This operating system is ideal for WiFi hacking as it contains plenty of Wireless tools. It has a very well maintained website and a devoted community. Built from Debian Squeeze (Fluxbox within a desktop environment) this operating system is particularly suited for WiFi hacking as it contains plenty of Wireless cracking and hacking tools.

Tools includes: Wifi attacks, SQL Hacking, Cisco Exploitation, Password Cracking, Web Hacking, Bluetooth, VoIP Hacking, Social Engineering, Information Gathering, Fuzzing Android Hacking, Networking and creating Shells.


15. Cyborg Hawk


The most advanced, powerful and yet beautiful penetration testing distribution ever created. Lined up with ultimate collection of tools for pro Ethical Hackers and Cyber Security Experts. It has 700 + tools while Kali have 300+ and also dedicated tools for and menu for mobile security and malware analysis . Also it is easy to compare it with Kali as to make a better OS than Kali we have to outperform it. It is a new operating system based on Ubuntu linux, i am not tested this OS that is why i placed it in the last of this list.

Cyborg Hawk is developed by Team Cybord led by Vaibhav Singh and Shahnawaz Alam from Ztrela Knowledge Solutions Pvt. Ltd.


Recommended article: Top Ten Popular Hacking Tools 

Monday, 27 April 2015

Setting Up BurpSuite Web Hacking Tool with Firefox and FoxyProxy

BurpSuite Web Hacking Tool- picateshackz.com

Burp Suite is an integration of various tools put together for performing security testing of Web applications. Burp Suite helps the penetration tester in the entire testing process from the mapping phase through to identifying vulnerabilities and exploiting them. This Burp Suite guide will help you to download and sett up BurpSuite web hacking tool with Firefox and FoxyProxy.

Web application vulnerabilities offer a large amount of risk to enterprise systems. Many web application vulnerabilities are a result of lack of input sanitization to the web application. In short, web applications leverage some form of input from the user and may process that information to serve content on the web application, or retrieve data from other parts of the system. If input isn’t properly sanitized, an attacker can send in an non-standard input to misuse the web application. 

In an effort to share techniques and knowledge learned over our time in the application security field, we'll be doing a series of blog posts on introducing people to Burp Suite. This first post will be an overview of how to get started with Burp and a browser for testing. We'll continue this series with other topics related to getting started in application security and testing web applications with Burp. Enjoy!


Everyone has their favorite security tools, but when it comes to mobile and web applications I’ve always found myself looking BurpSuite square in the eye. It always seems to have everything I need and for folks just getting started with web application testing it can be a challenge putting all of the pieces together. I’m just going to go through the installation to paint a good picture of how to get it up quickly.


BurpSuite is freely available with everything you need to get started and when you’re ready to cut the leash, the professional version has some handy tools that can make the whole process a little bit easier. I’ll also go through how to install FoxyProxy which makes it much easier to change your proxy setup, but we’ll get into that a little later.


Requirements and assumptions:

Mozilla Firefox 3.1 or Later
Knowledge of Firefox Add-ons and installation
The Java Runtime Environment installed

Download BurpSuite from http://portswigger.net/burp/download.html and make a note of where you save it.

Install the FoxyProxy Standard add-on for Firefox from https://addons.mozilla.org/en-US/firefox/addon/foxyproxy-standard/

Navigate to the directory you’ve downloaded BurpSuite to and double click the burpsuite_free_vx.x.jar file, in this example the file should be burpsuite_free_v1.5.jar
If this is your first time running the JAR file, it may take a minute or two to load, so be patient and wait. Soon you’ll see the loading splash screen followed by the program


BurpSuite is a proxy, which means that you’ll be forwarding all of the web traffic from your browser through BurpSuite so that you can see each HTTP Request and Response and manipulate it to your heart’s content. First, let’s configure this thing.

Click on the Proxy tab located on the top row, and then click the options tab just below in the second row.


You’ll notice all of the proxy settings available here, but there’s a few we want to focus on to get started. First, Look at the Proxy Listener section and make sure that the checkbox under the “Running”  column is selected and that the interface reads 127.0.0.1:8080


Next, make sure that the checkboxes for “Intercept requests based on the following rules” and “Intercept Responses based on the following rules” are checked in the following sections.


This will ensure that you capture both HTTP Requests you send and the Responses from the server.
Now, let’s head into firefox and configure FoxyProxy to route traffic through Burp for analysis. Open up Firefox, and note the FoxyProxy icon next to the address bar.


         Left click on the icon to open the configuration screen.

   Your default screen will look something like this


We will want to add a new proxy by clicking the “Add New Proxy” button. This will open up a window and pop you right on the Proxy Details screen with the Radio button “Manual Proxy Configuration” Selected. This is exactly what we want.  All we have to do here is fill in the same settings we placed in Burpsuite. IP address equal to “127.0.0.1” and Port equal to “8080”


Next head over to the “General Tab” at the top and fill in the details. It’s best to call it something you recognize, like “BurpSuite”


Go ahead and click OK and now we can start using our proxy.

Once you save you may see a notice that you haven’t enabled any whitelisted URL patterns. This is one of the features in FoxyProxy that will allow you to use multiple proxy services based on specific URL patterns. We won’t get into that in this guide, so for now just ignore the message for the time being and click “Yes”.
You’ll now see your newly added Proxy on the list. Make sure the enabled column is checked and click close
Now, remember that icon from earlier next to the address bar? If you right click, you’ll be able to select “Use proxy BurpSuite for all URLs”. Make sure Burp is running and visit any website you like. We’ll go to Google for now, so just type http://www.google.com into the address bar and click Go. If it appears that Firefox is taking forever to connect, it’s likely because burp is capturing the request, if not, you may have to enable intercepting in Burp, so let’s go over that now.

Go to BurpSuite and select “Proxy” on the top row of tabs, and “Intercept” in the second row of tabs, both highlighted orange here.


You will notice that my request to Google has been captured by BurpSuite. If you don’t see this you want to make sure that the “Intercept is On” button appears as circled in orange. If it’s set to “Intercept is off” your traffic is likely going through Burp but you’re not watching each request.

Moving forward, you can click the “Forward” button and look at each request and response as it comes through. You will see a blank white screen if there are no more requests or responses to pass.

If we head back to the browser you may see this message if you’re using Google over HTTPS.


You can add an exception everytime this happens when you’re using a proxy, but that can get a little annoying. We can also set Firefox to trust the burp certificate so that we don’t get this error.

The Professional version of burp allows us to get the certificate pretty easily, but in the free version we have to do a little work.

Since we're already on a page using HTTPS we can click "Add Exception...". If you navigated away from the page, simply visit any https enabled website and go from there.


Next you'll see the add exception screen which will allow us to view the certificate. Go ahead and click the View... button.


Here, you'll see that you have a certificate your browser is warning you about. Since we know that the Portswigger CA is us, we can go ahead and install this into Firefox, but in order to do this we'll need to export the certificate and note the location. Some important things to note here:

Make sure you select "PortSwigger CA" under the details of the certificate viewer before clicking export.


Make sure you save as the X.509 .crt, .pem file tye.


Click Save, and note the location.

We have to make sure this certificate is installed in Firefox. Accomplishing this is as easy as going into the options of Firefox and selecting "View Certificates" under "Advanced" in the Firefox Options pane.


On the next screen we just want to select import.


Select the certificate you exported earlier from the noted location and click OK. You will be prompted to select the type of trust for the certificate. You'll want to select "Trust this CA to identify websites"


If done correctly you should be able to find the "Portswigger CA" Certificate name under the "Authorities" tab.


Now, you should be able to navigate to any SSL site in burp without being prompted to trust the certificate. 

The next tweak we want to make is to disable Google Safebrowsing. Safebrowsing is obviously enabled for a reason but it can cause unwanted traffic during tests so we will disable it. 


  • Firefox button > Options > Options (or Tools > Options) > Security

And unchecking both "Block Reported attack sites" and "Block reported web forgeries".


I certainly hope this guide has been helpful in getting you up and running easily with BurpSuite. We'll be posting some additional tidbits in the near future on using Burp effectively.